
Want to know how to polish the corners of a glass tabletop safely and effectively? Sharp edges on glass tablet can be very dangerous for children and pets. Therefore, learning how to smooth sharp glass table corners is an extremely valuable skill. In this guide, we’ll show you the exact steps and tools you’ll need. As a result, you’ll be able to fix sharp corners on a glass table like a true professional.
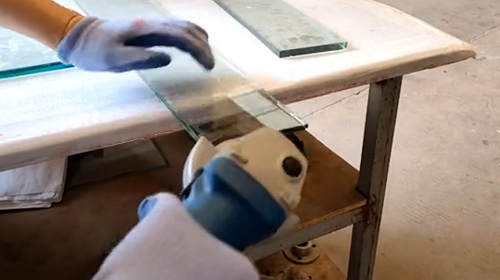
Tools and Materials Needed to Polish Glass Tabletop Corners
Before you begin your DIY glass edge polishing, you must have the right tools ready. The success of the project depends entirely on using the correct abrasives.
Safety gear: Safety goggles and cut-resistant gloves.
Water source: A spray bottle filled with clean water.
Masking tape: To protect flat glass surfaces from scratches.
Abrasives: A set of diamond sandpaper (Crucial).
Finishing (Optional): Glass polishing compound and a wool felt pad.
Practical Comparison: Choosing the Right Abrasives
To succeed, you must understand why traditional materials don’t work on glass. Here’s a simple comparison:
Regular sandpaper (silicon carbide): Wears out within minutes. Furthermore, it cracks very easily when wet and leaves uneven scratches on glass.
Diamond sanding sheet: Lasts 10 times longer. Specifically, it cuts hard glass effortlessly. Plus, it’s 100% waterproof, making it ideal for wet sanding.
Why You Need Diamond Sanding Pads for Glass
Regular sandpaper fails quickly on hard materials. As a result, you’ll only waste your time and money. Instead, you need to use a diamond sandpaper. These high-quality diamond abrasives have industrial-grade diamond particles embedded directly in the surface. Therefore, they can cut through glass quickly and cleanly.
Furthermore, diamond sanding sheets are completely waterproof. This makes them the absolute best choice for wet sanding glass.
Ready to upgrade your toolbox? Stop struggling with regular sandpaper. Check out our diamond sandpaper product specifications to learn about details and find the abrasive that best suits your project.
Preparation Before You Smooth Sharp Glass Table Corners
When working with any glass material, safety must be your top priority. First, you must always wear safety goggles and heavy-duty gloves. Glass dust can severely irritate your eyes and skin.
Next, secure the tempered glass tabletop properly. For example, you can place it on a stable workbench with rubber mats. This will prevent the glass from sliding during the sanding process. Finally, apply masking tape around the work area. This simple step protects the glass surface and prevents accidental scratches from the abrasive.
Step-by-Step: How to Smooth and Polish Glass Table Corners
Now, let’s begin the actual polishing process. Please follow these specific steps carefully to achieve a flawless, factory-like finish.
Step 1: Prepare for Wet Sanding Glass
You must never sand glass dry. Instead, you must use a technique called wet sanding. First, spray plenty of water directly onto the glass corner. The water effectively captures dangerous airborne glass dust.
In addition, the water keeps the glass cool during the process. As a result, you prevent heat buildup that could crack the glass. Therefore, be sure to keep your diamond sandpaper wet throughout the entire process.
Step 2: Round off the Sharp Point (Using Coarse Grit)
Next, take a sheet of coarse-grit diamond sandpaper. 120 grit diamond sandpaper is best suited for this initial stage. Hold the sandpaper at a 45-degree angle against the sharp corner.
Then, rub it back and forth using even and firm pressure. Continue this steady motion to remove the sharp edges from cut glass. Soon, that dangerous sharp corner will become a safe, rounded edge.
Step 3: Smooth the Edges (Using Medium Grit)
Once you’ve shaped the corner of the table, you’ll need to smooth out the deeper scratches. To do this, switch to 400 grit diamond sandpaper. Spray more water onto the glass surface.
Then, gently sand the corner you just rounded. This particular step requires much less physical pressure. Eventually, the edge will feel completely smooth to the touch. It will no longer snag or cut your fingers.
Step 4: Final Polish for a Clear Finish (Fine Grit & Compound)
Finally, you’ll restore the glass’s visual appearance. Use fine grit diamond abrasive (1,000 or 1,500 grit). This fine pad easily removes microscopic scratches, creating a beautiful satin finish.
If you want a completely clear edge, you can take one more step. Apply glass polishing compound (such as cerium oxide) using a soft felt pad. Rub the table corner vigorously until it gleams with a perfect, transparent sheen.
The Final Words
All in all, learning how to polish the corners of a glass tabletop is a very rewarding experience. In just a few minutes, you can make your furniture safer. However, the real secret lies in choosing the right tools. Standard abrasives will simply fail on hard glass. Therefore, you must use high-quality diamond sandpaper to achieve efficient results.
Take the next step with confidence. Does your next DIY or professional project require reliable abrasives? Consult our experts or request a quote to learn about our premium diamond sanding sheet. We’ll help you choose the perfect tools to ensure flawless sanding results every time.
FAQs
What grit sandpaper should I use to smooth glass edges?
You’ll need to use different grits of sandpaper in sequence to achieve the best results. First, use 120 grit to shape the table corner. Next, use 400 grit to smooth out rough edges. Finally, use 1,000 grit diamond sandpaper for the finishing touch. Therefore, purchasing a diamond sandpaper set that includes a variety of grits is the wisest choice.
Can you sand down a tempered glass tabletop?
Yes, you can sand the edges of tempered glass by hand. However, you must be extremely careful. You can gently sand the glass by hand using diamond sandpaper. Under no circumstances should you use high-speed power tools on tempered glass. Excessive pressure can cause the glass to shatter instantly.
How do you fix a chipped corner on a glass table?
You can easily repair minor chipped corners. First, mask off the chipped area with tape. Then, use coarse grit diamond abrasive to smooth out the jagged edges. Blend the chipped area seamlessly into the rest of the table corner. As a result, the corner will once again be safe and smooth.
Post time: Mar-01-2024