Engineered stone products are becoming increasingly popular due to their durability, versatility, and beauty. However, like any other material, engineered stone may become easily scratched and lose its luster over time. Fortunately, there are some effective ways to repair small areas of engineered stone and restore its original appearance.
The following steps outline the process for restoring the surface shine of engineered stone when it is bruised or scratched.
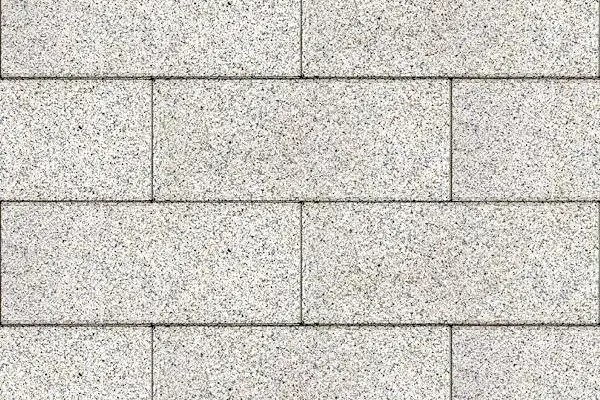
Stone wire and other special-shaped products
The following are the steps to repair the surface gloss of the stone line when it is bumped or scratched:
Step 1
1. To begin the repair process, the affected area must be sanded down using diamond sandpaper. The sanding process should be done gradually, starting with a coarse grit and working your way up to a finer grit. Typically, the sanding process begins with 200# grit, but if the scratch is deep, you may need to start with 60# or 120# grit. During the sanding process, it is important to apply “C-1# Liquid” to the stone line surface using a hard fiber pad (red) or hard cotton cloth. This helps keep the surface moist and aids in the polishing process.
2. As sanding progresses, a white slurry may appear. When it becomes sticky, additional “C-1# fluid” should be added to facilitate polishing.
3. After the initial sanding with a coarser grit, the next step involves further polishing the surface using finer sandpaper. This usually involves using 400#, 600#, 1000#, 2000# and 3000# sandpaper in sequence. During the entire process, “C-1# fluid” can be added to assist in grinding and polishing.
4. Once the sanding process is complete, the surface should be rinsed with water to remove any residue. After rinsing, the area should be inspected thoroughly to ensure that no polished areas were missed.
Step 2
1. Clean the surface: First, wipe the surface of the product with 1# steel wool to ensure that the surface is clean without any debris or residue.
2. Apply gloss wax: Apply gloss wax evenly on the surface of the product to form a thin layer of wax. Let the wax sit for 2 to 3 minutes, then wipe off the surface wax thoroughly with #1 steel wool.
3. Polish with 0# steel wool: Use 0# steel wool to carefully polish the surface of the stone wire until it reaches a bright appearance.
4. Wipe with soft cotton cloth: Take an unused dry soft cotton cloth and quickly wipe the surface of the stone lines back and forth to reveal a bright and smooth surface.
5. Maintenance: When the glossiness of stone lines decreases due to time, environmental factors, or other reasons, just use [Step 2] to polish.
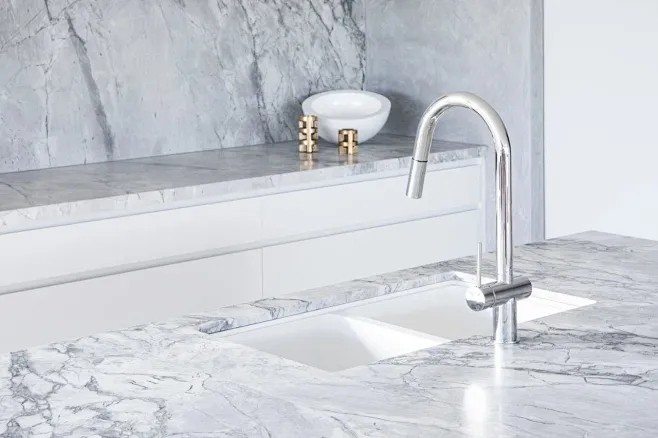
Large board, countertop
The following are the steps to repair the surface gloss of the countertop when it is bumped, scratched, or deeply corroded:
Step 1
1. The first step in restoring the luster of a large countertop is to renovate and sand it. The process involves polishing the surface using a hand polisher with a wet polishing pad and water. The grit size of the polishing pad depends on the severity of the damage to the countertop. For surface scratches, a polishing pad starting at 200# may be sufficient, while deeper scratches may require starting at 100#. It is important to keep the machine stable during the polishing process to ensure uniform polishing and avoid differences in plate flatness.
2. During the grinding process, the entire grinding area of the polishing pad must be covered to avoid missing any spots. After each disc is fully polished, the surface should be rinsed with water to remove any white slurry, and inspect the area for any missed polish.
3. Subsequent steps include using medium (400#), fine (800#), or even finer (1500#, 3000#) water grinding discs to further refine the surface.
4. After the polishing process is complete, rinse the countertop thoroughly with water, blow dry, and inspect for missed polished areas. If conditions are limited, water sandpaper can be used to achieve a polishing-like effect.
Step 2
Crystal surface treatment A: The method involves using a hand-tossing machine with a red scouring pad to mix crystal-hard powder with water to form a paste. The paste is then applied to the countertop surface and polished evenly over the specific area for a period of time. Repeat the process on high speed until the surface is dry. This treatment effectively addresses minor imperfections and restores the shine to your countertops.
Crystal surface treatment B: This method uses a hand-held polishing machine to apply maintenance and repair fluid on the surface of the countertop with 0# and 1# steel wool. Similar to Crystal Surface Treatment A, specific areas of the surface are evenly polished for a set amount of time, then polished at high speed until the surface is dry. This method can be repeated using different products until the desired results are achieved.
Glazing Wax Treatment: For countertops with lower requirements or that cannot be crystallized, glazing wax can be used. This method is to apply polishing wax evenly on the countertop surface to form a thin layer of wax. After letting the wax set for a few minutes, wipe the surface with steel wool for a bright, smooth finish.
It should be noted that during the polishing process, liquid splashes may occur, so surrounding items must be covered and protected. Additionally, it is recommended to use a combination of Crystal Surface Treatments A and B for best results, but using only one method can also be effective. Polishing wax treatments are suitable for countertops that are less demanding or where other methods are not feasible.
Post time: Apr-12-2024