With its timeless elegance and natural charm, marble has always been a favored choice for decorating interiors with its unique beauty. However, to truly bring out the luster of marble and maintain its integrity, the stone requires careful polishing. Here, we provide an insightful guide to the essential steps to effectively polish marble, adding a sparkling finish to its natural charm.
How to polish stone?
1. Dry Grinding: The Basics of Stone Polishing The first step in the stone polishing process usually involves dry sanding, which is designed to smooth the surface and remove imperfections. An essential tool for this stage is a stone refinishing machine, which effectively grinds the pores of the marble into finer particles, providing a smooth, uniform surface. This process carefully addresses surface irregularities, scratches, and minor imperfections, setting the stage for further refinement on the marble polishing journey.
2. Treat surface stains: eliminate imperfections for a flawless finish The natural beauty of marble can be compromised by surface stains, so careful treatment is required to bring out the stone’s inherent charm. All kinds of stains, whether caused by spills, oil, or other substances, can be effectively treated at this stage. For stubborn or deep-seated stains, specialized chemicals can be used strategically to facilitate complete removal. This step not only enhances the beauty of the marble but also ensures a pristine canvas for the subsequent polishing process.
3. Surface crystallization: a protective barrier that creates a long-lasting shine To further enhance and protect the marble’s stunning surface, surface crystallization is used to form a durable barrier against stains and scratches. Use a crystallizing machine equipped with a scouring pad and laundry detergent to carefully apply an elastic protective layer on the marble surface. This layer not only protects the marble from potential imperfections but also enhances its natural luster, giving it a long-lasting shine. The protective effect of this crystallization process is very significant and usually lasts for about a year, ensuring that the marble’s attractive luster is preserved for a long time.
4. Waxing: Improve the luster of marble Waxing is the final step in the stone polishing process, adding a refined shine to the marble surface while increasing its resistance to wear and tear. Through the careful application of specialized waxes, the marble’s natural luster and vibrant hues are highlighted, breathing new life into its timeless charm. The wax acts as a protective barrier, increasing the marble’s resistance to external factors and prolonging the preservation of its luminous finish. The typical duration of waxing is approximately three months and is effective in maintaining the vibrant appearance of marble, ensuring long-lasting beauty for a long time.
Stone grinding and polishing tips
1. Efficient dust removal: The critical pre-polishing step Before starting the polishing process, effective dusting is essential to achieve a perfect surface. Using a dust pusher in conjunction with a water suction machine ensures the effective removal of debris and excess moisture from the stone surface. It is essential to wait until the surface is completely dry before proceeding to the polishing stage, as any remaining moisture will compromise the effectiveness of the polish and diminish the final shine.
2. Maximize air circulation: Accelerates surface drying for best results During the polishing process, rapid surface drying is facilitated by optimizing air circulation. Simply opening a room door or window will improve airflow and speed up the drying of your marble surface. This simple yet effective method minimizes the waiting time required for the surface to reach ideal dryness, speeding up the entire stone grinding and polishing process.
3. Use floor wax methodically, improve the luster of stone surfaces: To enhance the luster and protective properties of the stone surface, the careful application of floor wax plays a vital role. Stirring the floor wax thoroughly and ensuring even distribution is crucial to maximizing its effectiveness. Use a brush to spread the wax evenly over the stone’s surface, taking care to fully cover all areas. After the wax is completely dry, polishing techniques enhance the shine, giving the stone an attractive sheen and enhancing its natural beauty.
Types of stone polishing discs
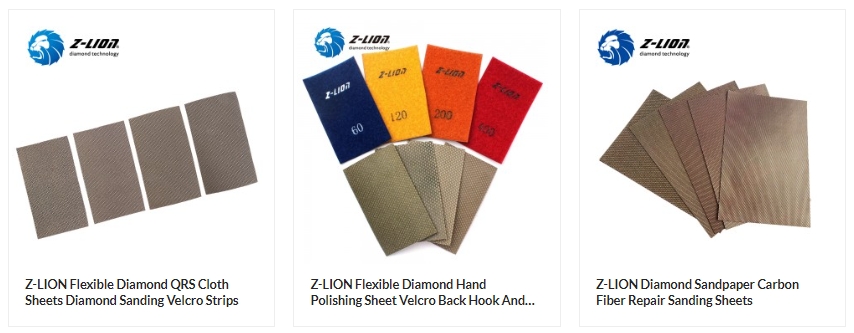
1. Sandpaper: Uses abrasive power to grind stone precisely
Sandpaper has an abrasive surface and is the quintessential stone polishing disc that excels at refining and smoothing rough stone surfaces. Sandpaper comes in various grit sizes from coarse to fine, making it a versatile tool for tackling different stages of the polishing process. The coarser grit helps grind the surface of the stone and remove imperfections, while the finer grit finely polishes and smooths the stone, giving it a lustrous shine. When used in combination with water or specialized lubricants, sandpaper minimizes heat build-up and prevents damage to the stone, ensuring controlled and effective stone polishing.
2. Polishing Pads: Nurture stone surfaces for refined shine and clarity
The polishing pad is an indispensable tool in the final stage of stone polishing. These pads come in a variety of grain sizes and are designed to gently refine and enhance the stone surface for a refined shine. Diamond polishing pads are particularly effective at imparting sheen to stone, while diamond polishing pads excel during the honing and polishing process, providing unparalleled precision and efficacy in refining the stone’s surface. By harnessing the power and versatility of polishing pads, craftsmen can elevate the aesthetic appeal of natural stone to unparalleled levels, giving it captivating clarity and brilliance.

Post time: Jan-26-2024