
Preparation Before Polishing Tiles
Preparing your tiles before grinding and polishing them is a critical step in achieving a smooth, flawless surface. Proper preparation helps ensure the surface is free of debris and contaminants, minimizing the risk of scratches and defects during grinding and polishing. By following the necessary preparation steps, one can improve the overall quality and appearance of the tile. Here are some basic considerations for preparing tiles before polishing:
1. Dust and Debris Removal: Before grinding and polishing tiles, any dust, brick scale or other debris present on the surface must be removed. Dust and debris can cause scratches and imperfections during the polishing process, affecting the final appearance of the tile. To effectively remove dust and debris, use a vacuum cleaner to thoroughly clean the tile surface to ensure that no particles remain that could interfere with the polishing process.
2. Surface Cleaning: In addition to using a vacuum cleaner, rinsing the tiles with water can help further remove remaining dust and debris. This step is especially important to ensure that the surface is free of contaminants that could interfere with the grinding and polishing process. By rinsing the tiles thoroughly with water, any remaining particles are washed away, leaving the surface clean and ready for subsequent polishing steps.
In conclusion, the preparation of tiles before grinding and polishing is a critical step in achieving a smooth, flawless finish. By removing dust, debris, and contaminants from the surface, one can minimize the risk of scratches and blemishes during the polishing process, ensuring a high-quality result. Whether it is a renovation project, a new installation, or the maintenance of existing tiles, proper preparation is crucial to achieving the level of quality and visual appeal required in tile polishing.
Sandpaper Mesh Selection
Choosing the right tile sandpaper grit is key to getting a smooth finish when polishing ceramic tile. The grit size of the sandpaper determines how abrasive it is and how refined it is on the tile surface. Understanding the properties and applications of different granularities is critical to achieving the desired smoothness and visual appeal.
1. 60 grit sandpaper:
60-grit sandpaper is commonly used for tile surface preparation and is effective in removing imperfections, rust, mortar residue, and other imperfections from the tile surface. It is particularly useful for addressing visible pits or bumps on a surface, allowing for initial surface leveling and preparation before more detailed sanding and polishing.
2. 120 grit sandpaper:
120-grit sandpaper is suitable for removing scratches, dust, and fine-scale from tile surfaces. This grit is often used to further refine the surface, address minor imperfections, and prepare the surface for subsequent polishing. It is particularly effective for smoothing surfaces and achieving a consistent finish.
3. 200 grit sandpaper:
200-grit sandpaper is ideal for achieving a smooth surface on the most common styles and colors of tile. This grit effectively refines the surface and creates a visually appealing finish. It is suitable for achieving a smooth and even visible surface, enhancing the overall aesthetics of the tiles.
4. 400 grit sandpaper:
Use 400-grit sandpaper to further refine the surface and remove any remaining scratches or roughness to achieve a smooth and polished surface. This grit is particularly effective on larger tile work surfaces or visible areas as it produces satisfactory results while saving time and effort.
By choosing the right sandpaper grit for tile polishing, individuals can effectively address imperfections, refine the surface, and achieve a high-quality finish. Grading from coarse to fine grains allows for a gradual refinement of the tile surface, resulting in a smooth and visually appealing appearance. Whether it is a residential, commercial, or industrial application, understanding the properties and applications of different sandpaper grits is critical to achieving the level of quality and visual appeal required in tile polishing.
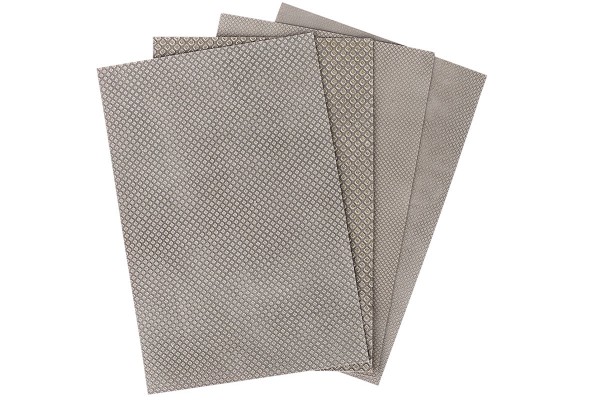
Each diamond grain of Z-LION electroplated diamond sandpaper is firmly held in place by electroplating, ensuring the entire diamond surface is utilized from start to finish. As a result, electroplated sandpaper is more efficient, allowing for consistent, efficient sanding from the first use to the last. In addition to its superior performance, electroplated diamond sandpaper offers flexibility comparable to traditional abrasive sandpaper. Electroplated diamond sandpaper lasts longer than traditional abrasive sandpaper. Its durable construction and precise diamond dispersion help extend its lifespan, allowing for long periods of use without compromising performance.
In summary, the choice of sandpaper grit is a key consideration in achieving a smooth finish when polishing ceramic tiles. By understanding the properties and applications of different particle sizes, one can effectively refine tile surfaces, address imperfections, and achieve high-quality finishes. Whether it is a new installation, renovation, or maintenance of existing tiles, choosing the appropriate sandpaper grit is critical to achieving the level of quality and visual appeal required in tile polishing.
Precautions
Precautions must be taken when using sandpaper to grind and polish ceramic tiles to ensure a smooth, flawless surface. By following these precautions, individuals can minimize the risk of sandpaper damage and achieve consistent, high-quality results. Whether it is a professional or DIY application, these precautions are critical to ensuring the effectiveness and safety of the grinding and polishing process. Here are some important precautions to consider:
1. Keep the sandpaper moist:
When using sandpaper to sand and polish ceramic tile, it is crucial to keep the sandpaper moist throughout the process. Dry sandpaper can easily cause premature damage to the tile surface and uneven polishing. By keeping the sandpaper moist, one can ensure that the abrasive particles remain effective and that the tile surface is polished evenly. This precaution is critical to achieving a smooth, consistent finish without compromising the integrity of the sandpaper.
2. Maintain sandpaper in water:
The sandpaper should remain in the water throughout the entire polishing process on the tile surface. This practice helps prevent the dispersion of mortar or gas from absorbing sand particles, ensuring that the sandpaper remains effective and the tile surface is evenly polished. By keeping the sandpaper in water, one can minimize the risk of contamination and ensure the grinding and polishing process runs smoothly and efficiently.
3. Be patient and careful:
The process of sanding and polishing ceramic tile is a slow and meticulous process that requires patience and attention to detail. During each step of the process, the surface of the tile must be carefully observed to ensure that any potholes, scratches, or other imperfections are completely removed. With patience and care, an individual can achieve a high-quality finish and effectively address any surface imperfections, resulting in a smooth, flawless appearance.
Post time: Apr-26-2024