
When drilling holes in tile, you often encounter a frustrating problem. The drill bit breaks through, leaving jagged, sharp edges behind. Therefore, mastering how to smooth edges of drilled holes in tile is an essential skill for any contractor. Proper edge finishing not only prevents injuries during plumbing or electrical installations but also stops micro-cracks from spreading across the surface of expensive tiles.
This guide will walk you through the most effective grinding techniques to achieve a flawless finish. By using electroplated diamond sandpaper designed for hard materials, you can easily achieve professional results. Next, we’ll explore the root causes of these rough edges.
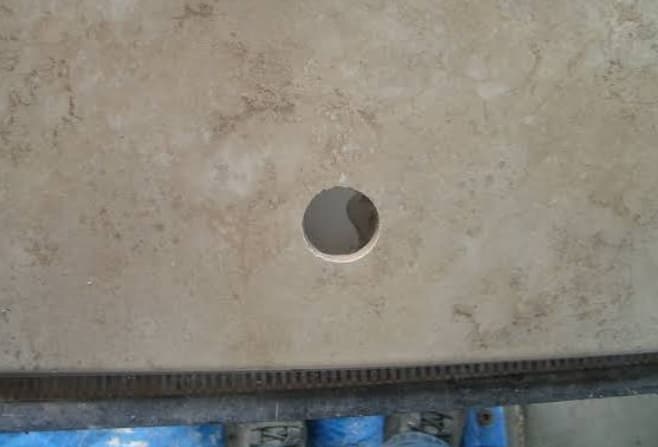
Why Do Drilled Holes in Tile Have Rough or Chipped Edges
Before learning how to fix this damage, you must understand why it occurs. Drilling into dense materials is inherently a destructive process. Therefore, some degree of edge chipping during installation is completely normal. Next, we’ll examine the typical issues you’ll face and the specific mechanical reasons behind this frustrating chipping.
Common Problems After Drilling Holes in Tile
When drilling into hard surfaces, it’s difficult to achieve a perfect cut immediately. As a result, you’re likely to encounter the following common issues.
First, you may notice rough and uneven hole edges. Second, drill holes often leave sharp edges that need finishing before inserting pipes or cables. Third, you may notice small chips around drilled hole. Finally, severe pressure can create micro-cracks caused by improper drilling. Therefore, proper tile hole edge finishing is absolutely essential for a high-quality installation.
Why Ceramic and Porcelain Tiles Chip During Drilling
Several factors can cause tile material to fracture during the drilling process
For example, the hardness of tile plays a significant role. Porcelain tiles have an extremely brittle surface structure, so the material tends to chip off rather than be cleanly cut during drilling.
Furthermore, incorrect drilling pressure can force the drill bit to penetrate the tile too aggressively, and this sudden penetration can tear the glaze. Finally, using the wrong tools or polishing methods can also ruin the final appearance.
How to Smooth Rough Edges of Drilled Holes in Tile?
Follow this step-by-step guide to restore a clean, safe hole.
Step 1: Clean and Inspect the Drilled Hole
First, you must clear dust and debris from the work area. A clean surface allows you to clearly assess the damage. Next, inspect the severity of chips around the hole’s edges. Minor roughness only requires light sanding. Conversely, deeper cracks require more aggressive material removal. Finally, decide whether grinding or fine polishing is needed based on your inspection.
Step 2: Choose the Right Abrasive Tool for Tile Hole Finishing
Choosing the right abrasive directly affects your work efficiency. Therefore, you must match the tool to the specific damage level.
Diamond Sandpaper: This is the best abrasive for smoothing tile edges. It excels at light edge smoothing and removing sharp edges, allowing you to quickly achieve a very fine finish.
Diamond Sanding Pad / Diamond Hand Pad: Choose this tool when dealing with larger areas of chipped edges. It offers excellent manual edge polishing, and its flexible surface conforms perfectly to the contour of hole. Browse our selection of diamond hand pads to find the right grit for your project.
Diamond Mounted Points: When heavy edge trimming or chamfering is required, use diamond mounted points attached to a drill or angle grinder. They are ideal for milling irregular edges or slightly enlarging existing holes.
Step 3: Smooth the Tile Hole Edge with Diamond Sandpaper
Now you’re ready to finish the hole.
First, select the appropriate diamond grit. Use 60 grit for heavy shaping, then switch to 200 grit for smoothing.
Next, wet the surface of the abrasive if necessary. Water helps flush away debris and extends the tool’s service life.
Then, sand along the hole edge evenly. Maintain consistent pressure in a circular motion.
Finally, check the results and repeat the steps above if necessary.
How to Smooth Different Types of Tile Hole Edges?
Different tile materials require slightly different grinding methods.
How to Smooth Ceramic Tile Holes
Standard ceramic tiles are softer and easier to grind. Therefore, you do not need to heavy pressure. Simply use a fine grit diamond abrasive for finishing. A 200 grit hand polishing pad can easily remove sharp edges from tile holes.
How to Smooth Porcelain Tile Holes
Porcelain tiles are harder than standard ceramic tiles. Therefore, it is strongly recommended to use high-quality electroplated diamond abrasives. When learning how to smooth porcelain tile holes, always avoid applying excessive pressure. Instead, let the exposed diamonds do the work.
How to Smooth Glass Tile Holes
Glass tiles are known for being fragile. Therefore, you need to use gentle grinding techniques. Be sure to use an extremely fine diamond grit. Additionally, use plenty of water to prevent overheating. Heat will cause the glass to shatter instantly.
How to Prevent Rough Edges When Drilling Holes in Tile?
Prevention can save you a lot of time during the finishing stage. Use the following checklist to minimize chipping.
Use the Correct Tile Drill Bit
Always choose a high-quality diamond core bit. Carbide bits often tear the ceramic glaze, whereas diamond bits grind smoothly through the material.
Apply Proper Drilling Pressure
Never force the drill bit into the tile. Instead, apply light, even pressure and let the tool determine the drilling speed. Excessive pressure will inevitably cause the tile to shatter on the back.
Keep the Tile Cool During Drilling
Friction rapidly generates extreme heat. Therefore, you must continuously supply water to the drill bit. A cool drill bit cuts faster and prevents thermal cracking of the tile.
Finish the Hole Edge Immediately After Drilling
Do not leave sharp edges exposed on the job site. Instead, immediately grind down the rough edges of tile holes. This prevents accidental chipping when installing pipes or fixtures later.
The Final Words
Understanding how to finish drilled holes in tile not only protects your installation but also ensures a professional appearance. You must use the right tools to efficiently work with hard materials such as porcelain and glass.
Our electroplated flexible diamond tools feature a unique nickel-plating process. Do you need a reliable grinding solution to speed up your construction projects? We invite you to request a quote for our diamond sandpaper products today. Consult our factory experts to find the exact specifications you need.
FAQs
How do you smooth rough edges of drilled holes in tile?
You can use flexible diamond abrasive tools to smooth rough edges. First, clean the hole. Second, choose a diamond mounted point, an electroplated diamond hand pad, or diamond sandpaper. Finally, sand the edge using circular motion until the roughness is gone.
What tool is used to smooth tile hole edges?
Professionals typically use electroplated diamond sandpaper, diamond hand pads, or diamond mounted points. These tools can easily cut through hard ceramic and porcelain glazes without causing further cracking.
What grit diamond sandpaper is best for tile hole edges?
60 or 120 grit diamond pads are best suited for initial shaping and removing large chips. Afterward, using 200 or 400 grit pads for fine smoothing and final finishing is ideal.
What is the difference between diamond sandpaper and regular sandpaper?
Regular sandpaper uses silicon carbide or aluminum oxide, which wears down quickly when sanding tiles. In contrast, diamond sandpaper features industrial diamond particles electroplated onto a flexible backing. As a result, it can grind much harder materials and has a significantly longer service life.
Post time: Aug-10-2026