When learning how to polish glass efficiently, basic chemical cleaning is not enough. Professional glass processing requires precise cutting and shaping tools that deliver powerful cutting performance without causing thermal damage. Whether you’re repairing industrial glass panels or grinding custom pieces, mastering the correct process is essential. Read our guide to diamond hand polishing pads for glass to discover the essential tools needed for a perfect finish.
Why Glass Gets Scratched and Loses Clarity
Glass surfaces are constantly exposed to friction and harsh environments. Additionally, improper cleaning tools often leave fine scratches. Dust and silica particles in the air gradually wear down the surface over time, much like fine sandpaper. Eventually, the glass loses optical clarity, resulting in a hazy appearance. To fully restore the glass, these surface defects must be removed mechanically.
Can Glass Be Polished: What You Need to Know Before Polishing
If the damage is limited to the surface layer, polishing can usually restore the glass. However, polishing cannot resolve structural cracks or deep gouges. You must first assess the depth of the scratch. If your fingernail catches on the scratch, it is likely too deep for standard wool pad polishing and will require grinding first. Before beginning any grinding or polishing, be sure to verify the structural integrity of the panel.
Professional Glass Polishing Process (Step-by-Step Guide)
Learning how to polish glass requires a systematic approach. Please follow the steps below to ensure professional results.
Step 1: Surface Cleaning and Protection
First, use masking tape to protect the surrounding area from contamination. Then, carefully clean the glass surface using a specialized solvent. All dust and sand particles must be removed before grinding. Finally, mark the repair area on the back of the glass to maintain focus during the process.
Step 2: Wet Sanding to Remove Scratches
This is the most critical stage of the process. Water must be continuously applied to prevent overheating, as dry grinding can cause thermal shock and glass breakage. Start with a coarse grit and use a diamond grinding block to the flat surface. It is recommended to progress sequentially from P120# to P240#, P400#, and finally to P600#. Unlike traditional silicon carbide abrasives, Z-LION electroplated tools resist clogging from glass dust. It allows faster cutting and a cleaner surface. Keep the surface fully lubricated throughout the process.
Step 3: Refine the Surface for Clarity
After wet grinding, the glass surface will have a uniform, hazy appearance. At this point, thoroughly wipe away the grinding slurry, then apply a polishing compound, such as cerium oxide. Next, use a wool felt polishing wheel, applying even and steady pressure, and avoid moving too quickly. Repeat until the desired optical clarity is achieved.
Best Tools for Glass Scratch Removal
When learning how to polish glass efficiently, tool selection is crucial. Electroplated diamond tools offer excellent heat dissipation and cutting efficiency.
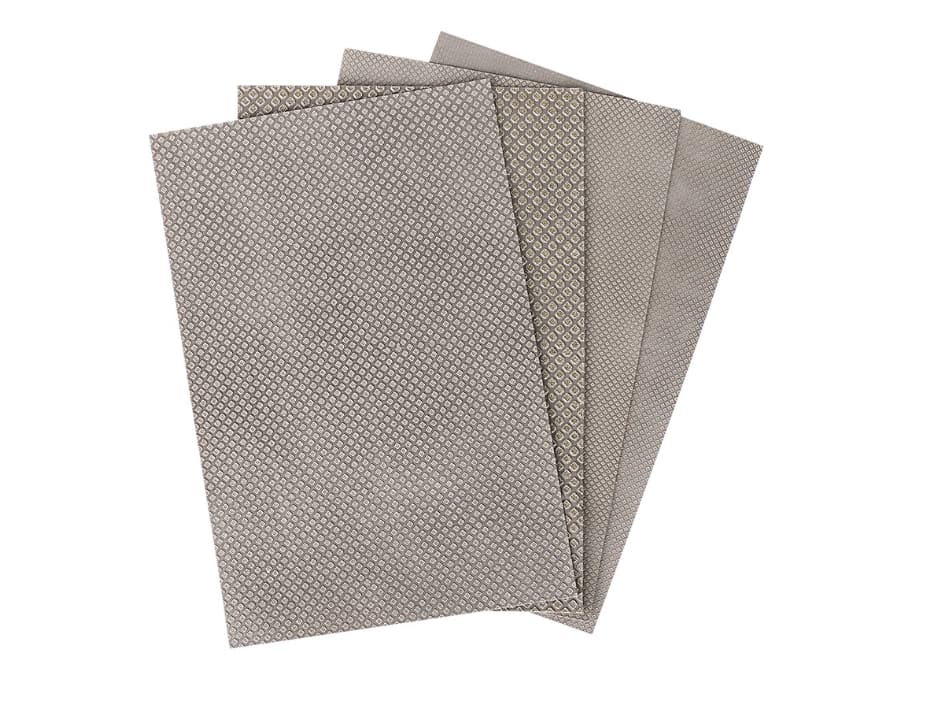
Diamond Sandpaper for Glass
The flexible sheets conform easily to curved surfaces and irregular contours. You can also cut them to fit custom adhesive pads for specific equipment.
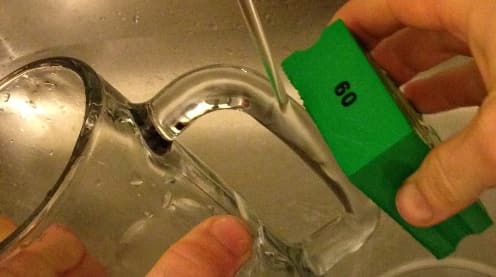
Electroplated Diamond Hand Pads for Precision Polishing
These hand pads provide excellent control, making them ideal for edge chamfering and localized scratch repair.
Flexible Diamond Sanding Blocks for Flat Surfaces
The grinding blocks provide pressure distribution across flat glass panels, reducing the risk of ripples or distortion.
Application Examples: Real-World Glass Polishing Scenarios
Different application require more targeted polishing strategies. Here are several common applications:
Case 1: Repairing Automotive Windshields
Windshields often develop fine scratches or haze due to worn wiper blades. Light polishing with flexible diamond sandpaper can effectively restore visibility.
However, please note that you must never treat structural damage deeper than 100 microns. Excessive polishing may create a dangerous lens effect (optical distortion), which can impair driver visibility. Before performing heavy grinding, please accurately measure the depth of the scratch.
Case 2: Removing Hard Water Stains from Shower Glass Doors
Stubborn hard water stains are a form of mild surface corrosion, and ordinary cleaners often have limited effectiveness. You can use a medium grit (e.g., P400#) electroplated diamond hand pad, keeping it well moistened, to quickly and thoroughly remove calcified deposits.
Case 3: Repairing Windows and Architectural Glass Panels
Window panels are easily scratched during construction or renovation. For these large, flat surfaces, using a flat sanding block with diamond-coated sandpaper ensures even pressure distribution. It effectively removes scratches while minimizing the risk of uneven grinding or optical distortions.
Deep Scratches vs. Light Scratches: Different Repair Strategies
You need to adjust grinding strategy based on the severity of the damage.
Deep Scratches: Aggressive material removal is required first. Start with diamond abrasives in P120# or P240# grit and continue sanding the area until the deep scratches are completely removed. Then gradually transition to finer grits.
Shallow Scratches: You can skip the coarse grinding step and start directly with a P400# grit, then transition to P600# to prepare the surface for final polishing.
Common Mistakes When Polishing Glass
When working with expensive glass panels, do your best to avoid the following mistakes.
Dry grinding: Never grind glass dry. Dry grinding causes thermal shock, leading to catastrophic glass breakage.
Skipping Grits: You must strictly follow the grit sequence. Jumping directly from P120# to P600# will leave deeper micro-scratches.
Using Non-Diamond Tools: Conventional abrasives clog quickly on glass. We recommend using electroplated diamond tools to maintain consistent and powerful cutting action.
Applying Excessive Pressure: Allow the exposed diamonds to do the cutting. Excessive force will result in an uneven surface and create ripples.
Finding the Right Glass Polishing Solution
Mastering the correct glass polishing methods can significantly save time and material costs. Following a standardized multi-step process is essential for professional results. From aggressive shaping to the final finish, electroplated diamond tools play a critical role: they reduce clogging, minimize heat generation, and shorten processing time.
If you are looking for high-performance grinding consumables for manufacturing operations, we are here to help. Browse our diamond abrasive range, or contact our team today to receive a customized OEM quote.
Frequently Asked Questions
Can I polish glass myself at home?
Yes. For projects such as shower glass doors or thick tabletops, you can achieve good results at home using the right diamond hand pads. Before you begin, be sure to test on a small, inconspicuous area to familiarize yourself with the technique and confirm the results.
Can I use these tools to polish scratches out of eyeglasses?
No. Eyeglass lenses typically feature precision anti-reflective and UV coatings, and any mechanical polishing can quickly damage extremely thin layers. Therefore, the repair of scratches on eyeglass lenses should be left to a professional optician.
What about polishing my glass stove top?
For burnt residue and stains, we recommend using a specialized cooktop cleaner and a non-abrasive sponge. Our industrial-grade diamond tools are primarily designed for heavy-duty material removal and shaping; their cutting power is too strong for household glass cooktops and may pose unnecessary risks.
Post time: Jul-14-2022