
Mastering the core scientific principles of composite repair helps extend the service life of damaged components and reduce replacement costs. However, to successfully complete a high-quality composite repair, a rigorous process must be followed. Therefore, you need to adhere to 3 fundamental principles to restore the structural integrity of the laminate. This article will provide a detailed analysis of these 3 core principles and their practical applications.
Principle 1: Understanding Primary vs. Secondary Bonding
First, you must recognize that structural repairs are fundamentally different from the initial manufacturing process. During manufacturing, the resin cures to form a primary bond. This dual chemical and physical bond integrates the reinforcing fiber fabric with the resin, creating a robust monolithic structure.
In contrast, all structural repairs rely on secondary bonding. In this case, the repair patch relies entirely on physical adhesion to the surface of the cured primary structure. Therefore, the strength of composite repair will directly depend on the bonding performance of the repair resin.
Research shows that resins with superior bonding performance should be selected. For example, the adhesive strength of epoxy resin is far higher than that of standard polyester resin. Consequently, epoxy resin is the perfect choice for high-performance structural repairs.
Principle 2: Increasing Surface Area for Stronger Composite Repair
The second principle focuses on the repair geometric. Since secondary bonding relies on surface adhesion, increasing the bonding area directly enhances overall bond strength. Therefore, you must carefully prepare the bond interface through proper sanding.
Scarf Sanding vs. Step Sanding
Typically, technicians use two primary methods to increase bonding surface area: scarf sanding and step sanding.
Scarf sanding creates a gradual taper by removing material at a controlled angle. Typically, you should maintain a slope ratio between 20:1 and 100:1. For thinner laminates, you can use a high-speed sander with specialized roloc sanding discs to achieve a smoother transition between the old and new plies.
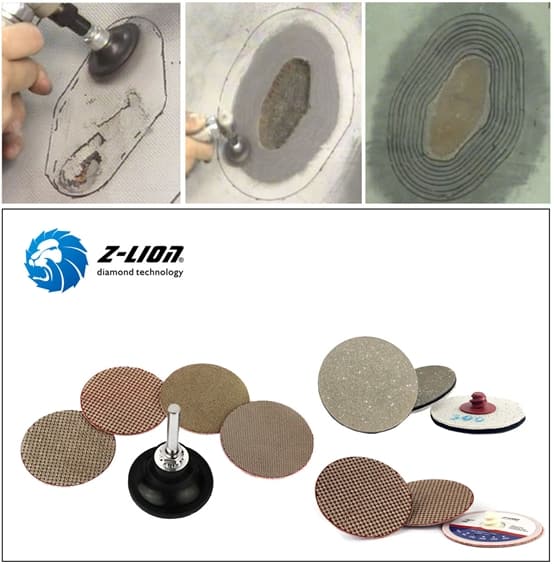
In contrast, step sanding removes material in a series of defined layers. While this method provides clearer visibility of fiber orientation, it requires extremely high precision. If the cut is too deep, it can damage the undamaged layers beneath the repair area. Therefore, most professionals recommend using the scarp sanding for composite material repairs.
The comparison table below can help you choose the appropriate sanding method:
| Evaluation Criteria | Scarf Sanding | Step Sanding |
|---|---|---|
| Key advantages | Smoother load transfer, simpler operation | High visibility of fiber orientation |
| Difficulty | Medium | Extremely high (risk of cutting underlying plies) |
| Common ratios/dimensions | 20:1 to 100:1 aspect ratio | 0.5-inch step between each layer |
| Best suited for | Thin laminates, critical structural components | Heavy, multi-layer composite structures |
Principle 3: Matching the Original Laminate Structure
The third principle states that your repair must replicate the physical characteristics of the original component. Specifically, you must ensure that the repaired area closely matches the thickness, density, and fiber orientation of the original laminate.
Why Matching Thickness and Ply Orientation Matters
If the repair area is too thick, that section will become excessively rigid, creating stress concentrations during service. These stresses can lead to fatigue damage and structural failure. To avoid this, you should replace each removed layer with the same material and ensure that the replacement fabric is laid in the original orientation. This layer-for-layer replacement method ensures the repaired structure can withstand the design loads.
Common Pitfalls in Applying These Principles
Even if you have mastered these 3 core principles, you may still encounter challenges during implementation. Therefore, before starting your next composite material repair project, review the following common pitfalls:
Pitfall 1: Incorrect resin selection.
Polyester resins generally do not bond effectively to cured epoxy surfaces.
Solution: When performing structural composite repairs, be sure to use high-quality epoxy resin.
Pitfall 2: Grinding the transition edge too steeply.
An excessively steep edge can lead to stress concentration.
Solution: Use professional diamond polishing discs to maintain a smooth, even taper.
Pitfall 3: Air bubbles trapped in the repair layer.
Voids significantly weaken the strength of the secondary bond.
Solution: Apply uniform pressure during curing, or use a vacuum bagging to eliminate trapped air.
Choosing the Right Tools for Your Composite Repair
Selecting the right surface preparation tools is essential for applying these principles effectively. For example, to achieve precise and smooth bevels, you need to use professional abrasives with exceptional durability.
If you are looking for reliable tools to enhance the efficiency of your composite material repair workflow, we are happy to assist you. You can browse our range of professional diamond grinding solutions or contact our experts for a customized quote. Contact our team today to find the most suitable tools for your repair needs.
Conclusion: Master the Art of Composite Material Repair
In summary, a deep understanding and strict adherence to these core principles is essential for getting durable, long-lasting composite repairs. By following the mechanics of secondary bonding, maximizing bonding surface area, and precisely matching the original laminate structure, you can achieve professional repair results.
After curing, be sure to carefully inspect the repair area to verify the bond quality. If you need any advice when selecting tools for your next composite repair project, our team is always ready to provide you with objective technical support.
Post time: Apr-07-2022